Thursday, January 29, 2009

Dumbbell shoulder press

The dumbbell shoulder press targets the top and center of your shoulder muscles. This exercise also works your upper back and triceps. Use caution if you have lower back, neck, or elbow problems.

Getting set
Hold a dumbbell in each hand and sit on a bench with back support. Plant your feet firmly on the floor about hip-width apart. Bend your elbows and raise your upper arms to shoulder height so the dumbbells are at ear level. Pull your abdominals in so there’s a slight gap between the small of your back and the bench. Place the back of your head against the pad. See photo A.

The exercise
Push the dumbbells up and in until the ends of the dumbbells are nearly touching directly over your head and then lower the dumbbells back to ear level. See photo B.

Do’s and don’ts
  • DO keep your elbows relaxed at the top instead of locking them.
  • DO stop lowering the dumbbells when your elbows are at or slightly below shoulder level.
  • DON’T let your back arch a great degree off the back support.
  • DON’T wiggle or squirm around in an effort to press the weights up.
Other options
Palms-in dumbbell press (easier): Do this exercise with your palms facing each other. This position allows your wrists and biceps muscles to help execute the movement.

Avoiding Mistakes When Training Your Shoulders


For many avid weight lifters, shoulder injuries don’t happen overnight. We know countless people who’ve lifted for years, sometimes ignoring minor shoulder pain, and then — pop! — they’re finished. Kaput. But what they perceive as a sudden injury is actually the result of years of overuse and poor form. Avoid the common mistakes to keep your shoulders strong and healthy.

Exaggerating the movement
If the instructions say lift the dumbbell “to shoulder height,” don’t lift the weight up to the ceiling, because lifting your arm to this unnatural angle adds undue stress to the joint with little advantage for increasing muscle tone. In other words, the risk of injury from lifting higher outweighs any minimal benefit of getting slightly stronger by increasing the size of the movement.

Arching your back
When you perform shoulder exercises while sitting on a vertical bench, make sure that you only have a slight gap between the small of your back and the backrest. Yes, arching your back gives you more leverage to lift heavier weights, but arching also cheats the muscles that you’re targeting and puts your lower back in a vulnerable position — causing injury.

Rocking back and forth
When you perform shoulder exercises while standing, relax your knees and maintain a tall posture. Many people lock their knees and lean back, a posture that your lower back muscles don’t appreciate. If you’re moving any body parts other than your arms, you aren’t targeting your shoulder muscles, and you’re using too much weight.

Performing behind-the-neck shoulder exercises
You’re likely to see lifters press a barbell overhead and then lower it behind the neck rather than in front. Some shoulder machines also involve behindthe-neck movements. Stay away from these exercises! They require a severe backward rotation of your arm, placing your shoulder and rotator cuff muscles in a weakened and precarious position. The movement also compresses the top of your arm bone into your shoulder socket, which tends to grind the bones and place your rotators under a great deal of additional stress. Always keep in mind that the benefit of any exercise should outweigh the risk. Suzanne, who knows better than to perform these exercises, nevertheless did a set of behind-the-neck shoulder presses while training for a weight lifting competition. The next day she couldn’t reach her left arm backward without wincing in agony — nor could she press a measly 5-pound dumbbell overhead without severe pain. Only after seven months of rest and rehab exercises did her rotator cuff injury begin to heal. Suzanne learned her lesson the hard way and now cringes when she sees people at her gym performing the very exercise that ruined her workouts for months.

Getting a Great Shoulder Workout


You can strengthen your shoulder muscles in through four main types of shoulder movements (although dozen of ways exist). Perform the following exercises in the order that they’re listed. In general, you lift the heaviest weights while pressing and the lightest weights while doing back fly movements.
  • Press: Straighten your arms up over your head. Shoulder-press exercises work the entire shoulder muscle.
  • Lateral raise: Raise your arms from your sides out to shoulder level. Lateral raises focus on the top and outside portions of the muscle.
  • Front raise: Raise your arms from your sides directly in front of you. Front raises work the front and top of the deltoid.
  • Back fly: Bend over from the hips as far as your flexibility permits to align your lift against the pull of gravity. Your chest should be as close to parallel to the ground as possible. Raise your arms out to the sides, working the rear and outside portions of the muscle.
From time to time, vary the order of your exercises to target your weaker muscles first and to provide a variety of stimulation for the muscle group to optimize conditioning. You needn’t include all four types of exercises in each shoulder workout, but you should aim to perform each type on a regular basis so you develop evenly balanced shoulder muscles. (Later in this chapter, you find out several variations of each exercise, as well as a few other shoulder movements that don’t fall into these categories.) Perform shoulder exercises with free weights rather than machines. Often, the motion feels unnatural with the machine and places excess strain on the neck. For people of diverse sizes, such as petite women, aligning the machine properly can be hard, especially on a machine that’s designed for a larger man’s body.

Tuesday, January 13, 2009

Enjoying Strong Shoulders


Your shoulders do a fair amount of work whenever you perform back and chest exercises, but performing exercises that single out your delts are also important for the following reasons:
  • Real-life benefits: Strong shoulders make most arm movements easier, whether you’re beaning your brother with a snowball, passing the potatoes across the table, or lifting your “a little too heavy” suitcase. Virtually every upper body exercise involves your shoulder muscles to some extent, so strengthening your shoulders enables you to lift heavier weights on chest and back exercises.
  • Injury prevention: If your shoulders are weak, they’re going to take a beating even if you perform chest and back exercises perfectly. Shoulder exercises also can prevent weekend-warrior type injuries, such as shoulder tears from swinging a sledgehammer, a torn rotator cuff from a softball tournament, or slapping a puck into the garbage can that serves as your hockey goal. If your shoulders are weak, you can even injure yourself while opening a dresser drawer.
  • Self-confidence factor: Open up any bodybuilding magazine and you see headlines such as, “Grow Those Big Caps Even Bigger” or “Delts to Die For.” Bodybuilders take their shoulder training seriously because they know that these muscles play a big part in their appearance, which, after all, is what bodybuilding is all about. Even if you don’t want to build competition-level delts, you can still develop toned, shapely shoulders and reclaim your confidence to wear sleeveless shirts. (Although you should wear sleeveless shirts any time that you please. But a toned shoulder muscle may put a little pep in your sleeveless step.)

Understanding Shoulder Muscle Basics


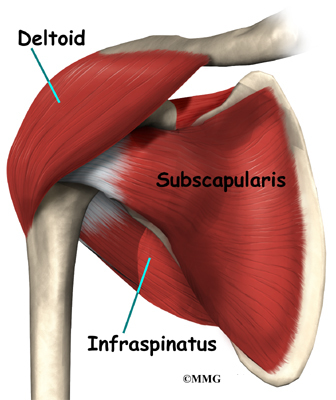
Your shoulder muscles, officially, are called the deltoids or delts. These muscles rest like a cap on top of the shoulder (the best way to see this is to hold your arm out horizontally). The delts are made up of three sections:
  • Center: The top or medial deltoid is on top of the shoulder. When this muscle contracts, you can lift up your arm.
  • Front: The front or anterior deltoid lies in front. When it contracts, your arm moves inward toward the center front.
  • Back: When the posterior deltoid in the back contracts, your arm moves back to the midline and can even move slightly farther back.
Your shoulder is able to move in so many directions because your shoulder joint is a ball-and-socket joint: The round head of your arm bone snaps neatly into your shoulder socket. Your hip is another ball-and-socket joint, but even that joint doesn’t have the mobility that your shoulder does. The rotator cuff is a group of four muscles that keep your arm from slipping out of its socket. They lie underneath your delts, performing their job in complete anonymity.

Unfortunately, the rotator cuff muscles are so anonymous that many people don’t even know that these muscles exist and, therefore, don’t bother to train them. The only time they seem to get any recognition is when a professional baseball pitcher is sidelined for the season by a rotator cuff injury. Your rotator cuff muscles stabilize your shoulder joint and enable you to twist your arm while your elbow is straight, such as when you turn your palm to face forward and then backward. They also get into the act during throwing and catching motions and when you raise your arms above your head.

Assisted dip

The assisted dip primarily works your chest muscles with a lot of emphasis on your shoulders and triceps, too.
Use caution if you have elbow, shoulder, or lower back problems.

Getting set
For this exercise, deciding which plate to put the pin in can be confusing because you follow the exact opposite rule of every other exercise. In this case, you choose more plates if you want the exercise to be easier and fewer plates if you want the exercise to be harder. The more plates you select, the more your weight is counterbalanced during the exercise. For example, if you weigh 150 pounds and you place the pin in the plate marked 100, you have to lift only 50 pounds of your body weight. But if you put the pin into the plate marked 50, you have to lift 100 pounds.
After you’ve set your weight, step onto the platform of the assisted dip machine, and then carefully kneel on the kneepad or step on the foot bar as required by the machine at your gym. Grip the lower bars with your palms facing inward and straighten your arms. Pull your abdominals in and keep your body tall. See photo A.

The exercise
Lower your body until your upper arms are parallel to the floor and then push back up. See photo B.

Do’s and don’ts
  • DO relax your shoulders so they don’t hunch up by your ears.
  • DO keep your abdominals pulled in so your back doesn’t arch.
  • DO keep your neck aligned with the rest of your spine instead of allowing your chin to jut forward.
  • DON’T explode back to the start and snap your elbows.
  • DON’T lower your body farther than the point at which your upper arms are parallel to the floor.

Other options
  • Traditional dip (harder): Stand facing a dip station, and place your hands on the dip bars. Hop up so your feet are off the floor. Straighten your arms and lift your body upward. Keep your legs straight, or bend your knees slightly and cross one ankle over the other. Remain tall and relaxed with your abdominals pulled inward. Bend your elbows and lower your body only until your upper arms are parallel to the floor. Straighten your arms to lift yourself back up.
  • Negative-only dip (easier): If you find a traditional dip too difficult, perform only the negative phase: Use your muscle power to lower yourself and then jump up to the start after every repetition. However, when you jump up, take it easy on your elbows.
  • Weighted dip (harder): Do the basic version of the exercise with a special waist belt designed to hold a weight plate on the end of it.

Cable crossover

The cable crossover strengthens your chest muscles with emphasis on the shoulders as well.
Be careful if you have shoulder, elbow, or lower back problems.

Getting set
Set the pulleys on both towers of a cable machine to the top position. Clip a horseshoe handle to each pulley. Stand between the towers with your legs comfortably apart and with one foot slightly in front of the other. Grasp a handle in each hand, palms facing down and slightly forward. Tighten your abdominals, lean slightly forward from your hips, and relax your knees. See photo A.

The exercise
Keeping a slight bend in your elbows, pull the handles down so one wrist crosses slightly in front of the other. Then slowly raise your arms up and out to the sides until your hands are level with your shoulders. See photo B.

Do’s and don’ts
  • DO exhale deeply before bringing your hands together.
  • DO initiate the move from your chest; in other words, keep your shoulders, elbows, and wrists in the same position throughout.
  • DON’T forget that slight forward lean: It takes the pressure off your lower back.

Other options
  • Flat bench cable fly: Set the cables to the lowest point on the towers, and place a flat bench in the center of the towers. Grasp a handle in each hand and lie on your back. Straighten your arms up directly over your shoulders and then spread your arms down and to the side until your elbows are just below shoulder level. This motion is the same one used in the flat bench dumbbell chest fly.
  • One-hand crossover: Do the basic cable crossover one arm at a time. Place the unused hand on your hip or hold onto the cable tower.

Vertical chest press machine

The vertical chest press machine focuses on your chest muscles, with additional emphasis on your triceps and shoulders. Most vertical chest machines have more than one grip so that you can work your chest muscles in different ways.
Use caution if you have shoulder or elbow problems.

Getting set
Sit in the machine so the center of your chest lines up with the set of horizontal handlebars. Press down on the foot bar so that the handles move forward. Grip the horizontal handles. Straighten your arms, pushing the handles forward.
Keep your abdominals tight so your upper back remains on the pad.
See photo A.

The exercise
Remove your feet from the foot bar — you’ll feel the weight of the stack transfer into your hands. Slowly bend your arms until your hands are just in front of your chest, and then push the handles forward until your arms are straight. When you’ve completed your set, put your feet back on the foot bar and let go of the handlebars before you lower the weight stack all the way down. See photo B.

Do’s and don’ts
  • DO keep your neck against the backrest.
  • DON’T press so quickly that your elbows snap shut and your shoulders come up off the backrest.

Other options
Different angles: You may find chest machines that position you horizontally and at many angles between horizontal and vertical. Other machines work the left and right sides independently of each other; in other words, the left and right levers of the machine aren’t connected to one another, so when you raise the weight, both sides of your body have to fend for themselves. Machines with independent action are a good alternative for those with leftright muscle imbalances or those who want to combine the safety of using a machine with the feel of using free weights. Try them all for variety to challenge your chest muscles differently.
Vertical grip (harder): Use the vertical handle of your chest machine. This grip factors out a lot of the help you get from your shoulders when using the horizontal grip.

Incline chest fly

The incline chest fly principally exercises your chest muscles, with plenty of focus on your shoulder muscles. The work also puts few focus on your triceps, though less than a lot of other chest works out. Give extra attention to your form if you have had shoulder (especially rotator cuff), elbow, or lower back injuries.

Getting set
Incline the bench a few inches. Set the incline at 1-5 inches on the bench, depending on the bench. Holding a dumbbell in each hand, lie on the bench with your feet flat on the floor or on the bench, whichever feels more comfortable to you. Press the weights directly above your chest, palms facing each other. Tuck your chin to your chest to align your neck with the rest of your spine and maintain your natural back posture, neither arched nor flattened. See photo A.

The exercise
Spreading your arms apart so that your elbows travel down and to the sides, lower the weights until your elbows are just below your shoulders. Maintain a constant bend in your elbows as you lift the dumbbells back up. Imagine that you have a barrel lying on your chest, and you have to keep your arms wide to reach around it. See photo B in Figure.

Do’s and don’ts
  • DO feel a stretch in the outer edges of your chest. Hold a moment in the lowered position to feel it even more.
  • DON’T forget to keep the bend in your elbows as you lower the weights. If your arms are too straight, you place excessive pressure on your elbows and shoulder joints.
  • DON’T move your elbows any lower than specified or you risk damaging your shoulder and rotator cuff muscles.

Other options
  • Flat chest fly: Do the same exercise on a flat bench. The incline version emphasizes upper chest fibers, while the flat version calls in the middle and lower fibers as well.
  • Decline chest fly: Do this exercise on a decline bench, with your head lower than your feet. The hardest thing about this version is picking up and releasing the weights. Grab the weights while you’re sitting up, hold them against your chest, and ease yourself into the decline position. When you’re done with the exercise, gently ease the dumbbells off to either side to the floor. (Don’t just drop them.) Better yet, ask someone to hand the weights to you at the start of the exercise and take them away when you’re done.