Friday, December 31, 2010

How to Have A Healthy Back?


Regular exercise is one of the best ways you can prevent back pain. Good body mechanics, or moving properly, as you sit, stand, bend over, pick things up, and push and pull furniture are also important. Repetitive motions, if performed incorrectly over time, can cause joint strain and injury. You aren’t helpless against back pain. What you do daily makes a powerful difference. Small changes can go a long way to preventing debilitating pain. Observe the following basic tips for a lifetime of back health.
  • Exercise regularly: Following a consistent, balanced exercise program will go a long way toward keeping you fit and strong.
  • Use good posture: You can practice good posture every waking moment and improve your posture. Naturally, you aren’t going to remember every minute, but the more times that you catch yourself slouching, the more often you can correct yourself and use your core stabilizers.
  • Move properly: The most common way people injure their backs is when they bend over, pick something up, and turn their body as they stand. Practice good movement mechanics whenever you lift, bend, or pick up and carry anything. Even if you pick up a pencil, use good movement habits. That way when you pick up something that is heavier, you’re much more likely to do it properly.
  • Check your desk setup: Make sure your desk at the office and at home is set up according to good ergonomic principles. Make sure that your chair fits your body and that your computer and monitor are positioned so that as you work, you use good posture.
  • Use a headset: Many people spend a lot of time talking on the phone and bending their necks into awkward positions. Your head weighs anywhere from 8 to 12 pounds. If you hold it improperly, you can affect your overall posture. Use headsets whenever possible, especially for extended conversations.
  • Use a backpack: People often carry heavy and unbalanced loads on their shoulders. Balance the weight by using a good quality backpack and avoid carrying things that are too heavy.
  • Buy furniture that offers support: Every chair or couch that you sit on affects your posture, particularly if it’s a piece of furniture that you use often. A good bed is also important, because you spend one-third of your life sleeping, and if you’re not getting good support, it will affect your posture. Make sure the furniture in your life is also supporting a healthy back and good posture.

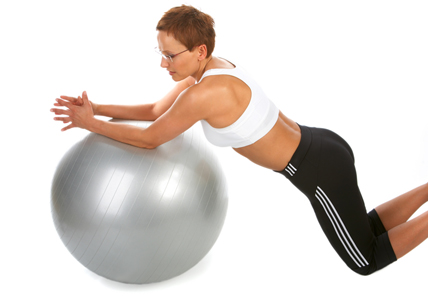
Core Programs for Good Balance and a Healthy Back


More than 80 percent of adults in North America suffer from back pain at some point in their adult life. That statistic is staggering. In the United States, back pain is the leading cause of disability from work. One major American corporation spent $75 million in only one year to pay healthcare providers who treated employees with low back pain. Back pain is often related to poor posture and lack of stability in the spine, due to weak core muscles. In addition, poor postural stability over the years eventually leads to balance problems in later years. Increasingly, older adults are suffering from falls or from the fear of falling. The same contributing factors that present as a pain in the back when you’re younger, can lead to a broken hip or permanent use of a walker when you’re older. One out of every three people over age 65 falls at least once a year. Twenty five percent of people over the age of 50 who break a hip die from a fall within the first year after the accident. About 50 percent of those who break their hips never regain full walking ability. That should get your attention. The loss of balance and postural control doesn’t happen overnight, but occurs slowly over the years, as the muscles that support good posture grow weaker.
Just as you need to take preventive measures against osteoporosis and muscle wasting, you need to act now to preserve your sense of equilibrium for the future. Better balance also serves you well in dozens of sports, from mountain biking to rock climbing to in-line skating. You’ll catch on to these activities more quickly and avoid injuries that would befall those with a shakier sense of balance.
More and more health clubs are adding classes onto their schedules that incorporate core training and balance exercises and use balance training equipment.

How to set up your home gym for quickies?

If you think you’ll need quickie workouts from time to time to keep up your conditioning; then streamlining your home gym is essential. If you only have ten minutes to exercise, you don’t want to spend six of those minutes trying to find where you put your exercise bands. Management of your home gym space is critical for successful quickies. The following tips help ensure that your home exercise space is ideal for quickies.
  • Consistent space: If space permits, the ideal situation is to have a dedicated space that’s only used for your exercise sessions. In many homes, however, space is at a premium. If you can’t allocate a spot only for exercise, at a minimum choose a place that you use consistently and that’s large enough for your movement needs.
  • Storage containers for equipment: You must have proper storage for your equipment in order to find it quickly and to avoid accidents. Storage is particularly important when it comes to dumbbells because other family members or you may trip over randomly placed equipment. For every type of equipment that you purchase — dumbbells, bands, tubing, stretch straps, mats — you need to have a place for it to belong. Store dumbbells on racks and use baskets or crates for bands, tubing, and stretch straps.
  • Workout plans or log: You want to be able to do your routine immediately. If you haven’t memorized it, you need to reference it quickly and easily. If you keep a workout log, keep it with all of your equipment. All of your workout design resources (such as this book) should also be easily available.
  • Clock or timer: If you know that time is always going to be an issue, keep a clock visible either in or near your workout area. As an alternative, keep a timer and set it for 10 or 15 minutes or whatever you’ve allocated, so you’ll stay within your time budget and be sure to complete your planned exercises.

Tuesday, November 30, 2010

Putting Together Your Quickie Routine


Observe the following points each time that you train.
  • Always warm up. Even for a quick workout, you need to prepare your body for more rigorous work. Walk briskly for five minutes before you exercise. This warm-up includes walking quickly around the house, the yard, or in the parking lot at the office.
  • Work all major muscle groups. Be sure to do exercises for your upper body, your lower body, and your core a minimum of twice a week.
  • Apply program variables. Even for short workouts, training frequency, exercise selection, order, amount of weight, number of reps, number of sets, and your rest periods are all still important components. Just because you’re doing a quickie workout does not mean that you can throw all the weight training principles out the window. All the rules still apply.
  • Train in one minute sets. In general, one set of a particular exercise takes approximately one minute. If each rep requires two seconds up, a brief pause, and two seconds down, plan on five to six seconds per rep. Therefore, a set of 10-12 reps takes roughly one minute.
  • Alternate upper and lower body exercises. When you want to reduce the waiting time during rest periods, switch between upper and lower body exercises so that one part of your body rests while the other works. Save your core exercises for last.
  • Mix in stretching exercises. To be even more efficient, use your rest periods for stretches that target the muscle that you just worked. You can stretch your body all throughout the workout, and you won’t need extra time for a stretching segment at the end.

Making the Most of Quickie Training


Organize these quickies in whatever way works best for you. The following suggestions give you several ideas on how to fit quickie workouts into your lifestyle.
  • Emergency total body conditioning: Normally, you do a 25-minute weight training workout 3 days a week. Imagine a time when your schedule is overloaded and you can’t possibly follow your normal workout routine. Instead of doing nothing, use one of the total body workouts to keep your muscles stimulated.
  • Add on to your cardio workout: Let’s say you weight train two days a week and hit the gym for cardio on three days a week. When you can’t make it for your dedicated weight training sessions, add on a 15- or 10-minute quickie workout on the weight machines, after you finish your cardio-training.
  • Divide your workout throughout the day: Sometimes it’s simply impossible to find more than a few spare minutes. Instead of giving up on strength training entirely, fit in a quickie workout in the morning and in the afternoon. You might even want to add on another session at night. Three 10- or 15-minute workouts easily add up to 30 or 45 minutes of training.
  • Do a daily quickie: Maybe all you ever have time for during the week is a quickie workout. Until your life settles down and you find more time, schedule a daily quickie workout. Each day target either the upper or lower body and the core. Take Friday off. On Saturday, fit in one thorough total body workout and rest on Sunday.

Quickie Workouts for Busy Days


For best results, you want to train your entire body at least two to three times a week. Three times a week gives you faster results but takes more of your personal time. Studies show that you get 75 percent of your results from training two days a week, compared to training three days a week. Life happens. You can’t always stick to an ideal training schedule. For those days and weeks that are simply too busy, shorter workouts are better than no workouts. Or you can split up training your body into short increments daily so you hit at least each section of your body at least two times a week. Your training program needs to fit your life.
In this blog category, you get a variety of quickie workouts to use for those busy periods when you can’t follow an ideal training schedule. The quickies are organized in 10 and 15 minute segments and are appropriate for either the gym or the home. As a personal trainer and international presenter who’s trained thousands of people worldwide, Shirley recommends that you try to find at least 15 minutes each day in your schedule for a workout so that exercising becomes part of your daily routine — like brushing your teeth. These routines give you plenty of choices for what to do in those 15-minute increments.

Doing circuits at the gym


Many gyms have a dozen or so machines arranged in a circle or row called a circuit. They’re placed in a logical order (from larger to smaller muscles) so you can move from machine to machine without having to use any brainpower to decide which exercise to do next.
Some fitness facilities, such as Curves®, revolve entirely around circuit training.
Many facilities also offer cardio-resistance circuits where in-between strength training stations, they have cardio stations. For example, you may jog or march in place, do jumping jacks, or jump on a trampoline in-between lifting weights. The concept behind these workouts is keeping your heart rate at the low end of an aerobic training zone so you also receive some aerobic conditioning benefits as well. Because this workout represents a compromise, you’re not getting an optimum cardio or strength workout. Instead, you’re trying to hit two goals at once, which is of course, better than hitting only one or no goals, especially if you’re time crunched. After reviewing weight training principles, you may understand why circuits are a good place for beginners to start training. Typically, you’ll do one set at each machine and have about a 30-second rest interval between stations. This is the lower intensity side of the spectrum and has a reduced risk of injury.

Sunday, October 31, 2010

Using the rest period


How long you rest in-between sets is also a part of your routine. If you want to increase maximal strength, you need a long rest period of up to four minutes. If you’re looking to improve muscular endurance, 30 seconds or even less rest is fine. And, if you want to increase size, your rest period should be about 30 seconds to one-and-a-half minutes. If you are a beginner, and that lasts for at least the first three consecutive months of training, take as long as you need. You’re considered a beginner until you have completed three consecutive months of consistent training at least two to three days a week.

Choosing the right weight


The right weight level depends on what you want to achieve from your training, because it relates to the number of reps that you perform. To develop strength, you want to do one to six reps. To increase muscle size, do between 6 to 12 reps. And, to improve endurance, do between 12 and 20 reps. A onerep max equals the total amount of weight you can lift with one repetition and means you’re giving a 100 percent effort. More reps represent what are referred to as sub-maximal loads. See the bullet points below for reference.
_ 1 rep = 100 percent
_ 2-3 reps = 95 percent
_ 4-5 reps = 90 percent
_ 6-7 reps = 85 percent
_ 8-9 reps = 80 percent
_ 10-11 reps = 75 percent
_ 12-13 reps = 70 percent
_ 14-15 reps = 65 percent
_ 16-20 reps = 60 percent

As you can see, a moderate intensity workout of lifting 70 to 80 percent of your one rep max is in the 8 to 13 rep range. Performing fewer reps — and using ultra-heavy weights — carries a greater risk of injury. And doing more than 12 reps is generally not effective for building strength, but doing up to 20 to 25 reps does improve muscular endurance. To keep yourself motivated and your muscles challenged, you may want to vary the number of reps you perform. You can use a periodized program that first emphasizes muscular strength and then later emphasizes muscular endurance. For example, you can do 6 to 8 repetitions one month and then 12 to 15 the next. Finding the right weight for each exercise requires some trial and error. Don’t be afraid to add or subtract weight after you start a set. We’ve seen people contort their bodies to finish a set just because they overestimated what they could lift but who were too embarrassed, too stubborn, or simply not aware of the huge risk of injury to drop down a plate.

Doing exercises in the right order


In general, follow the rule of doing your upper and lower body exercises in the order of your larger muscles first, and then your smaller muscles. Lastly, exercise your middle body, your lower back and abdominals, as they serve to stabilize your body as you do all the prior exercises.
Upper body
  1. Chest and back (It doesn’t matter which comes first.)
  2. Shoulders
  3. Biceps and triceps (It doesn’t matter which comes first.)
  4. Wrists
Lower body
  1. Butt
  2. Thighs
  3. Calves and shins (It doesn’t matter which comes first although we prefer to work our calves before our shins.)

Middle body
Perform your abdominal and lower back muscle exercises in any order you want. Mix up your core stabilization exercises with those that target the mover muscles, or do your mover exercises first, followed by your stabilizer exercises or vice versa. Researchers haven’t yet determined whether an ideal order exists for training the muscles of this part of the body.

Thursday, September 30, 2010

Your lifestyle


Ask yourself (and answer honestly): “How many times can I work out each week? How many hours can I spend at the gym, including time in the shower and the locker room?” If you’re a busy parent who also works full time, chances are you have less time to work out than a college student or retired person. Be realistic. Don’t vow to do six sets per muscle group if the only time you’re able to lift weights is during your 30-minute lunch break on Tuesdays and Thursdays. Otherwise, you fall into that why-bother? trap. You’re better off doing a 20-minute routine than skipping that 2-hour workout you planned but somehow never got around to.

Your exercise preferences


When you first take up weight training, you may be overwhelmed by the challenge of knowing the basics of each exercise — how to stand, where to grab the weight, how to adjust the machines, when to inhale and exhale. But you soon develop strong preferences for certain exercises and equipment. Before you know it, you’ll be saying things like, “I love the incline chest fly, but I’d much rather do the dumbbell chest press on a flat bench.” Pay attention to which exercises feel good to you and which equipment you enjoy using, and design your workout accordingly. Keep in mind, however, that it’s natural to prefer the exercises that you’re better at doing. Sometimes, you may need to push yourself to do exercises that you don’t love to balance out your conditioning. Keep an open mind. You may even surprise yourself when you grow to love the push-ups that you used to hate.

Reality check: Plastic or perfect?


By the way, take a big reality check: Don’t expect to look like the sculpted, fat-free people who sell weight training products on TV infomercials or magazine ads. Many of these models have unusual genetics, have taken drugs, and/or have undergone liposuction and added implants to achieve their looks (in addition to being digitally enhanced by professional film producers). In fact, among men, chest or pec and calf implants are popular, while more and more women are getting butt implants. Mentioning this phenomenon is not to advocate plastic surgery. This is simply to let you know that most people who have bodies that look a little too perfect are likely to have achieved that look through unnatural means. So don’t set yourself up for failure before you begin by trying to look like a TV or magazine model by using natural methods. It’s impossible. Simply aim to be your best you.

Tuesday, August 31, 2010

Weight training equipment


Naturally, the exercises you choose are limited to the equipment that’s available to you. If you belong to a health club the size of Wal-Mart, you may be able to try every exercise in this book — and probably a few thousand more. One four-story club in New York City devotes an entire floor to leg machines. If you work out at a smaller club or at home, your choices are more limited, but even with rudimentary equipment, you can get your body into great shape. If you’re short on equipment, you may want to consult a trainer to find out how to make the most of the gizmos you have access to or to help you decide which key pieces of equipment you should own to achieve your particular goals.

Identifying why you want to train


Too many people blindly go through the motions of a weight training program without stopping to ask themselves, “What the heck am I trying to accomplish?” So give this question some serious thought. Are you planning to scale the Grand Tetons, or do you just want to strengthen your back to add oomph to your golf swing? Remember the principle of specificity. Here’s a rundown of some common goals and how you can reach each of them. You may want to consult a trainer or medical doctor for advice that’s even more specific to your needs.

_ Improve your health. If you aspire to increase your strength, keep your bones strong, and avoid common injuries, you need not spend half of your waking hours with hunks of steel in your hands. You can get by with one exercise for every major muscle group in your body. Simply perform one set of 8 to 15 repetitions for each of the following muscle groups:
• Butt (glutes)
• Front thighs (quadriceps)
• Rear thighs (hamstrings)
• Calves
• Chest (pecs)
• Back
• Abdominals (abs)
• Shoulders (delts)
• Front of upper arm (biceps)
• Rear of upper arm (triceps)
The American College of Sports Medicine (ACSM) recommends doing two or three workouts a week.

_ Alter your looks. Weight training can be a powerful tool for changing your appearance by toning up your muscles, adding definition to your body’s shape, and adding size if desired and your genetics permit. If you’re large boned and muscular, however, weight training can’t make you lean and flexible — and vice versa. You need to work within your body’s parameters.
Significantly overhauling your body’s appearance requires more of a time commitment than simply improving your health. (And keep in mind that your diet, lifestyle, and cardiovascular workouts play a large role, too.) Instead of training your entire body in 25 minutes, you may need to spend 20 minutes simply on your upper body. To develop a noticeably firmer body, we suggest performing at least three sets per muscle group.

_ Train for an athletic event. Preparing for an athletic challenge at any level takes time and dedication (and weight training, of course, is just one aspect of your training). For best results, you need to tailor your weight routine precisely to the event. For example, if you’re working toward a hilly 10K walk or run, you need to give extra attention to your leg and butt muscles. And your workout will be completely different if you want to simply complete a 10K run rather than win it. Serious competitors should expect to spend a lot of serious time in the weight room at certain times of the year (primarily the off-season). And, you should consult a trainer or coach who specializes in working with athletes for a comprehensive, periodized program.

Your short-term goals should focus on the behaviors, in other words the things that you need to do or not do, to achieve your longterm objective. Your training program design should reflect your specific training objectives.

The slide exercise

The slide is the perfect abdominal exercise for people prone to lower back or neck pain. Performing the slide is a good way to get your abs in shape for more challenging abdominal exercises.

Getting set
Remove your shoes. Lie on your back with your knees bent comfortably, feet hip-width apart, toes up, and heels digging into the floor. Rest your arms at your sides. Pull your abdominals in and gently push — but don’t force —your back into the floor so, to some extent, you flatten out the natural curve of the small of your back. See photo A.

The exercise
Slowly slide your heels forward as you gradually straighten your legs; don’t allow your abs to push upward or your back to pop up off the floor, even a little. Continue straightening your legs until you can’t keep your abs tight or your back on the floor or until your legs fully extend. Then slowly slide your heels back to the starting position, again taking care not to relax your middle muscles. See photo B.

Do’s and don’ts
  • DO slide your legs out only as far as you can while keeping your back in contact with the floor. As you get stronger, you’ll be able to straighten your legs all the way while keeping your abs pulled in and your back flat.
  • DO keep your head, neck, and shoulders relaxed.
  • DO move slowly and take the time to feel your abs working.

Other options
  • Single-leg slide (easier): Slide out one heel at a time. Do an equal number of reps with each leg.
  • Slide with paper plates (harder): Place your heels on two paper plates or in plastic bags. You have to work even harder to slide slowly and with control.
  • Short slide (harder): Slide your heels out to the point where you need to work the hardest to maintain your back placement on the floor. Slide your heels a few inches back and forth several times so you’re constantly working.

Saturday, July 31, 2010

Reverse plank

The reverse tabletop plank is an all-around excellent core stabilizer, working abs, back, glutes, and shoulder stabilizer muscles. This exercise excels because it works so many muscles simultaneously, which is the way that we challenge our bodies in real life.

Getting set
Lie on your back with your knees bent and palms under your shoulders, and then lift yourself into a tabletop position. Point your fingers in whatever direction is most comfortable for your shoulders. Slide your shoulders down. Pull your abdominals inward.

The exercise
As you exhale, squeeze your buttocks and push up onto your heels. Avoid arching your upper or lower back. Hold your head in the most comfortable position for your neck — either upright and looking down your torso or lowered gently toward the back. Work up to a 30-second hold.

Do’s and don’ts
  • DO keep your abdominals pulled in so you don’t arch your lower back or pop out your ribs.
  • DO keep your shoulders down. Avoid hunching or collapsing into your shoulders.
  • DON’T let your bottom sag down.

Other options
Reverse plank (easier): Lie on your back with your legs straight and palms under your shoulders, and then lift yourself onto your hands. Lift your hips, keeping your knees over your ankles, your abs and gluts tight and your spine lengthened. Supporting a shorter length is easier for your core stabilizers.
Reverse plank with leg lift (harder): Keep your torso parallel to the ground. Alternate lifting and lowering one leg at a time as high as you can without lowering your hips.

All fours spinal stabilization

All fours spinal stabilization is an excellent exercise to condition postural muscles and to prevent lower back pain.
If you have wrist pain when you put your palms on the ground, try doing the exercise on your closed fists.

Getting set
Kneel on all fours in a tabletop position with your hands under your shoulders and knees under your hips. Slide your shoulders down. Pull your abdominals in.

The exercise
Lift and extend opposite arm and leg out straight. Keep your chest and hips parallel to the ground. Lower your arm and leg back to start. Repeat with other arm and leg.

Do’s and don’ts
  • DO concentrate on keeping your torso parallel to the ground.
  • DON’T hunch your shoulders or arch your back.

Other options
Spinal stabilization arms only or legs only (easier): Instead of simultaneously lifting the opposite arm and leg, only lift alternating arms. Repeat, only lifting alternating legs.
Spinal stabilization same side arm and leg (harder): Instead of lifting your opposite arm and leg, lift the arm and leg on the same side.

Side plank

The side plank conditions core stabilizers, especially the muscles that support the shoulder girdle and lower back.
Use caution if you’re prone to shoulder discomfort.

Getting set
Recline on your left side, left hand palm down under your shoulder. Place your top right hand in front of your body. Keep your torso perpendicular to the ground, relax your shoulders, and pull in your abdominals.

The exercise
Push into your left hand and lift your hips up into a side plank position. Work up to a 30-second hold.

Do’s and don’ts
  • DO keep your shoulders down and neck lengthened. Don’t hunch or collapse into your shoulder.
  • DO continue to breathe normally as you hold the position. Avoid holding your breath.
  • DO move smoothly and with control.
  • DON’T collapse your chest forward or lean backward. Keep your torso perpendicular to the floor.

Other options
Modified side plank (easier): Start with your right elbow under your shoulder and with your lower leg bent at a right angle at the knee. Keep the top leg long and straight.

Side plank lifts: Instead of holding the elevated position for 30 seconds, lift and lower your hips and work up to 12 repetitions.

One-legged side plank (harder): When you reach the elevated position, pick your top leg off the floor and hold it straight at hip height.

Wednesday, June 30, 2010

Plank Exercise

The plank is a basic core stabilization exercise that works your abs, back, glutes, and shoulder stabilizer muscles.
Do the easiest version if you have any shoulder discomfort.

Getting set
Lie facedown with your knees bent. Place your elbows under your shoulders. Slide your shoulders down and lengthen the back of your neck so your ears are in line with your shoulders. Gently pull your abdominals inward. See photo A.

The exercise
As you exhale, curl your toes under and push up onto the balls of your feet.
Avoid arching your upper or lower back. Work up to a 30-second hold.

Do’s and don’ts
  • DO keep your abdominals pulled in so you feel more tension in your abs and so you don’t overarch your lower back or pop out your ribs.
  • DO keep your shoulders down and your neck lengthened. Avoid hunching your shoulders.
  • DON’T lift your butt in the air and rest your weight on your legs.

Other options
Plank on knees (easier): Lift up on your knees, keeping your abs and glutes tight and your spine lengthened. Supporting a shorter length is easier for the core stabilizers.
One-legged plank (harder): Keep your torso parallel to the ground. Lift one leg. Work up to a 30-second hold. To make it even more difficult, pick up and extend the opposite arm as you also hold up one leg.

Avoiding Mistakes When Training Your Core


Most of us are weak in the core, so we need to pay particular attention to form and quality of movement.
Keep these tips in mind to get the most out of each of your core exercises:
  • Avoid looking like an old donkey. When you forget to tighten your abdominal muscles, particularly the deepest layer (the transversus abdominis), your back sags in the middle. When Shirley was guest teaching at a resort in Jamaica, she saw an old donkey — the perfect example of this curved posture. Now, when she teaches core exercises, she always reminds her students not to look like old donkeys. To avoid donkey posture, draw your abdominals in toward your spine as you exhale and keep your abdominals contracted for the duration of the exercise.
  • Don’t pop out your rib cage. Another good way to check whether your deep abdominal muscles are active is to look at the position of your rib cage. Draw your lower ribs in snug toward your spine. If your ribs flare up and out, your deep trunk stabilizers aren’t active. Tighten them up.
  • Don’t stick your butt up in the air. When you’re training your abs and back in positions like the plank or a push-up, you need to rely on the strength of your core muscles and not your legs. You can always tell that you are cheating by relying on your leg strength if your butt is sticking up in the air. Make sure that it is no higher than your shoulders.
  • When you exhale, always lift your pelvic floor up and pull your abdominals in toward your spine. The best way to activate your deep abdominals and pelvic floor muscles is by exhaling actively as you lift your muscles up and in. Exaggerate your exhalation as you do your core stabilization exercises to make sure that you’re using these muscles.

Getting a Core Workout


To get a great core stabilization workout, you need to focus on keeping your torso solid. Because the objective of core training is to improve muscle endurance, instead of sheer strength, isometrically held exercises such as the plank are effective training methods. In addition, core exercises train your body’s stabilizer muscles to work together. For example, preventing low back pain isn’t simply about strengthening your abs. To provide optimal support for your spine, your abs, back, pelvic floor, and hip muscles all need to work together. Unlike other exercises that isolate and target a specific muscle or muscle group, core stabilization exercises challenge your whole body to work together. Form is critically important. Always stop doing an exercise when you can no longer execute it with perfect form.
Unlike the mover muscles that are closer to the surface of your body, your deep stabilizer muscles are made up of almost 100 percent slow twitch fibers. In other words, these muscles aren’t designed for short bursts of strength and power. Instead, these muscles are meant to be working at all times that you’re in motion. Therefore, unlike strength training exercises that require you to push yourself to fatigue and then rest for at least 48 hours, you can do core stabilization exercises daily. In fact, daily core stabilization exercises remind you to use your postural muscles as you sit, drive, stand, run your errands, or work at the office.
Last, but certainly not least, core exercises improve your sex life. As you tone up your pelvic floor and your deep abdominals, regain mobility in your spine, and improve control over your pelvis, your sex life gets a great boost. Shirley, as a health and wellness educator, assures you that research evidence shows that a healthy sex life is definitely good for your overall well-being. As if we need studies to tell us that.

Monday, May 31, 2010

Enjoying a Strong Core


Core stabilization exercises aren’t sexy, but they’re critically important to enjoying everyday living.
  • Real-life benefits: A strong core supports good posture and proper joint alignment. Good posture not only makes you look and feel better but also prevents back pain. A strong core allows you to stand for long periods of time without pain or survive sitting at your desk and working at your computer for long hours.
  • Injury prevention: Good posture places the least amount of stress on your joints. Strong stabilizers keep your neck, shoulders, hips, and knees properly aligned to minimize wear and tear on your body. Strong stabilizers also let you use the strength in your arms and legs. For example, if you don’t have a stable shoulder joint, regardless of how strong your arms and back are, lifting items like a suitcase without hurting your shoulder may be tough.
  • The “Feel Good” factor: Nothing boosts your confidence like great posture and moving from the center of your being. Standing up tall; facing life straight on. That’s what it’s all about.

Toe lift

If you’re prone to shin splints and ankle problems, adding the toe lift to your repertoire is a must.

Getting set
Stand with your feet as wide as your hips and your legs straight but not locked. You may hold onto a sturdy object for support. See photo A.

The exercise
Keeping your heels firmly planted into the floor, lift your toes as high as you can. Feel the tightening through the lower part of your shins. Lower your toes. See photo B.

Do’s and don’ts
  • DO lift only the part of your foot that’s in front of the ball of your foot.
  • DON’T rock back onto your heels.

Other options
Seated toe lift (easier): Do the toe lift while seated with your knees bent.
Exercise sequence (harder): Do the toe lift immediately following calf raises.
Band toe lift (harder): Do the toe lift while seated, but wrap a band around the back edges of your toes. You’ll feel resistance both when lifting your toes and when lowering them. (Don’t use the band to help lift though.)

Standing calf raise

The standing calf raise hones in on your calf muscles.

Getting set
Stand on the edge of a step. (Or, if you have a step aerobics platform, place two sets of risers underneath the platform.) Stand tall with the balls of your feet firmly planted on the step and your heels hanging over the edge. Rest your hands against a wall or a sturdy object for balance. Stand tall with your abdominals pulled in. See photo A.

The exercise
Raise your heels a few inches above the edge of the step so you’re on your tiptoes. Hold the position for a moment, and then lower your heels back down. Lower your heels below the platform in order to stretch your calf muscles. See photo B.

Do’s and don’ts
  • DO lift as high as you can on your toes.
  • DO lower your heels down as much as your ankle flexibility allows.

Other options
Standing calf machine: Stand with your shoulders snugly underneath two pads and your heels handing off the edge of a platform. The standing calf machine isolates the gastrocnemius. If you want to get your soleus into the act (and you do if you do a lot of activities that involve walking, running, or jumping), look for a seated calf machine. Your knees fit underneath a platform and your heels again hang off the edge.
Add a dumbbell (harder): Holding a dumbbell in one hand adds resistance to this exercise and also forces you to balance more because you won’t be able to hold onto something with both hands.
One-leg calf raise (harder): To work one calf at a time, bend one knee behind you and raise the heel of your other foot up and down. Do the same number of repetitions with each leg.

Friday, April 30, 2010

Inner thigh lift

The inner thigh lift strengthens your inner thigh muscles. Use caution if you have lower back problems.

Getting set
Roll up a bath towel (or use a step aerobics platform). Lie on your right side with your head resting on your outstretched arm. Bend your left leg and rest your knee on top of the rolled towel so that your knee is level with your hip and your top hip is directly over your bottom hip. Place your left hand on the floor in front of your chest for support. Pull your abdominals in. See photo A.

The exercise
Lift your bottom (right) leg a few inches off the floor. Pause briefly at the top of the movement, and slowly lower your leg back down. Switch sides and do the same number of repetitions with your left leg. See photo B.

Do’s and don’ts
  • DON’T lift your leg more than a few inches. Stop when you feel tension in your inner thigh. How high you need to lift depends on your flexibility, your strength, and your build.
  • DON’T arch your back as you lift your leg.

Other options
Modified inner thigh lift (easier): Instead of placing your top knee on the towel, bend your knee and place your foot behind your bottom leg.
Inner thigh lift with a weight (harder): Wear an ankle weight while performing the inner thigh lift. If you have bad knees, drape the weight on top of your inner thigh.

Side-lying leg lift

The side-lying leg lift strengthens your outer thigh muscles. Pay attention to the instructions marked by the Posture Patrol icon, particularly if you have a history of lower back pain.

Getting set

Lie on the floor on your left side with your legs a few inches in front of you, knees bent slightly, and head resting on your outstretched arm. Bend your right arm and place your palm on the floor in front of your chest for support. Align your right hip directly over your left hip and pull your abdominals in so your back isn’t arched. See photo A.

The exercise

Keeping your knee slightly bent, raise your right leg until your foot reaches shoulder height. Then slowly lower your leg back down. Switch sides and do the same number of repetitions with your left leg. See photo B.

Do’s and don’ts
  • DO keep your top hip stacked directly over your bottom hip; don’t roll backward.
  • DO keep your head down and your neck and shoulders relaxed.
  • DO keep your abdominals pulled in to help your body remain still so you work only your outer thigh.
  • DON’T raise your foot any higher than shoulder height.
Other options
  • Modified leg lift (easier): Bend your top knee even more when performing the side-lying leg lift.
  • Leg lift with rotation (harder): When you reach the top of the movement, rotate your thigh outward by turning your knee up to the ceiling; then rotate back to the original position and lower your leg back down.
  • Leg lift with a weight (harder): Place an ankle weight on your ankle or, if you have knee problems, on top of your thigh.

Inner/outer thigh machine

The inner/outer thigh machine sets to strengthen either your inner thigh muscles or your outer thigh muscles. Skaters, skiers, and basketball players —anyone involved in side-to-side movements — can help prevent injury by using this machine.

Getting set
Set the machine so the leg mechanisms are together and the knee and ankle pads are rotated to the outside. Sit up tall in the seat, and bend your knees so they rest against the thigh pads and the outside of your ankles rest against the ankle pads. If there’s a seat belt, wear it to help keep you from popping out of the machine. Pull your abdominals in and sit up tall. See photo A.

The exercise
Press your knees outward until you feel tension in your outer thighs. Hold the position for a moment, and then slowly allow your legs to move back together. This is the outer thigh, or abduction, exercise. To set the machine for the inner thigh, or adduction, exercise, shift the leg mechanisms so they’re comfortably spread apart, and turn the knee and ankle pads toward the inside. Position your legs so that the inside of your knees rest against the thigh pads, and the inside of your ankles rest against the ankle pads. Pull your legs together, and then slowly move them back out to a point at which you feel a comfortable stretch through your inner thighs. See photo B.

Do’s and don’ts
  • DO control the movement in both directions. If you hear the weight stack come crashing down, slow down.
  • DO change the weight between exercises if you need to. Most people use approximately the same weight for both inner and outer thigh exercises, but don’t take that for granted.
  • aDON’T arch your back or wiggle around in the seat in an effort to assist your legs.

Other options
Vary seat position: Some machines allow you to decline the seat back a few degrees or even all the way down so you can lie flat. Experiment with different back positions to see what’s most comfortable for you and to give the exercise a different feel.

Wednesday, March 31, 2010

Leg curl machine

The leg curl machine does a great job of strengthening your hamstring muscles.
Use caution if you have a history of lower back discomfort.

Getting set
Set the ankle pads of the machine so that when you lie on your stomach, the underside of the pads are flush with the tops of your heels. Lie down, rest the side of your face on the support pad, and grasp the handles. Gently flex your feet. Pull your abdominals in and tuck your hips down so your hipbones press into the pad. See photo A.

The exercise
Bend your knees to lift the ankle bar until your calves are perpendicular to the floor. Then slowly straighten your legs. See photo B.

Do’s and don’ts
  • DO keep your hipbones pressed against the machine and your abdominals pulled in. You may want to lift your thighs just a hair upward before you bend your knees.
  • DO lower your legs back down slowly so the weights you’re lifting don’t slam down against the rest of the stack.
  • DON’T — and this is a big don’t — allow your butt to pop off the pad. This puts stress on your lower back and minimizes the work being done by your hamstrings.
  • DON’T kick your heels all the way to your butt.

Other options
Other curl machines: Some machines work your hamstrings from a standing or seated position. Others have independent left and right sides so that each leg has to carry its own share of the weight. Still others have a “range limiting” device that allows you to cut off the movement at the top or bottom —a good variation if you’re experiencing any pain while doing this exercise.
Single-leg curl: Lift with both legs, straighten one out of the way, and lower the weight down with one leg only.

Kneeling leg curl

The kneeling leg curl targets your hamstring muscles.
Pay extra attention to good form if you have lower back or knee troubles.

Getting set
Kneel on your elbows and knees on a mat or thick towel, with your knees directly under your hips and your elbows directly under your shoulders. Clasp your hands together or turn your palms toward the floor. Flex your right foot so it’s perpendicular to the floor. Keeping your knee bent, lift your right leg and raise your knee up to hip level. Tilt your chin slightly toward your chest and pull your abdominals in so your back doesn’t sag. See photo A.

The exercise
Straighten your leg and then bend your knee. Complete all the repetitions with one leg before switching sides. See photo B.

Do’s and don’ts
  • DO keep your neck still and your shoulders relaxed.
  • DO move slowly so you feel the tension in the back of your thigh.
  • DON’T use an ankle weight for this exercise: It places too much pressure on your knee.
  • DON’T just throw your leg out straight and snap it back again.
  • DON’T raise your leg above hip height.Bulleted List
  • DON’T arch your back as you curl and uncurl your leg.
Other options
Variations (easier): To make this exercise easier, lie on the floor with your forehead resting on your forearms. Lift your thigh slightly off the floor, and then curl and uncurl. Or do this exercise while standing and holding onto the back of a chair or the back of an upright bench with your hands.
Weighted leg curl (harder): Add weight to this exercise by wrapping an ankle weight around your ankle or thigh. Or do a kneeling or standing version of the exercise with the low pulley of a cable machine that has a padded ankle strap.

Leg extension machine


The leg extension machine zeroes in on your quadriceps muscles. If this exercise bothers your knees, try the modified version or choose a different exercise.

Getting set
Set the machine so your back sits comfortably against the backrest, the center of your knee is lined up with the machine’s pulley, and your shins are flush against the ankle pads. (On most machines you can move the backrest forward and back and the ankle pads up and down.) Sit down and swing your legs around so your knees are bent and the tops of your shins are resting against the underside of the ankle pads. Hold on to the handles. Sit up tall and pull your abdominals in. See photo A.
The exercise
Straighten your legs to lift the ankle bar until your knees are straight. Hold for a second at the top position, and then slowly bend your knees. See photo B.

Do’s and don’ts
  • DO make sure that you take the time to set the machine properly.
  • DO move slowly.
  • DON’T ram your knees at the top of the movement.
  • DON’T arch your back in an effort to help you lift the weight.

Other options
Modified leg extension (easier): If one leg is noticeably stronger than the other, slide one leg out of the way and do this exercise one leg at a time. You probably will need less than half the weight you use when lifting both legs together.
Single-leg extension: Many leg extension machines have a mechanism you set to limit the distance that you bend and straighten your legs. Use this device if your knees give you trouble at any point of the exercise.
Ball squeeze leg extension (harder): Place a soccer ball, weighted ball, or rolled towel between your knees. As you extend your leg, concentrate on squeezing the ball so it doesn’t slip out of place. This version of the exercise forces your quads to work harder in order to hold onto the ball.

Saturday, February 27, 2010

Quad press


The quad press is a particularly good quadriceps exercise for people who feel pain when they bend and straighten their knees.

Getting set
Roll up a bath towel. Sit on the floor and lean against a wall with your legs straight out in front of you. (Or bend the nonworking knee into your chest if that’s more comfortable.) Place the towel underneath the well of your right knee. See photo A.

The exercise
Squeeze your quadriceps tightly and press down on the towel. Hold for five slow counts, relax, and repeat until you complete the set. Then switch legs.
See photo B

Do’s and don’ts
  • DO bend your nonworking knee into your chest if that makes the exercise more comfortable.
  • DON’T tighten your face, hunch your shoulders, or round your back.

Other options
Modified quad press (easier): If you experience pain in your knee when you do this exercise, try squeezing your muscle for a shorter period of time. Start with one second and build up. Also try squeezing without the towel underneath your knee. Or to make the exercise tougher, replace the towel with a firmer object such as a tennis ball or filled water bottle. This replacement allows you to squeeze harder.
Straight leg raise (harder): Sit in the same position, but instead of pressing your thigh downward, lift your entire leg up and off the floor a few inches. Hold a moment and slowly lower to the start. You can also do this version of the exercise with an ankle weight wrapped around your ankle or draped across your thigh.

Kneeling butt blaster


The kneeling butt blaster works your butt with some emphasis on your hamstrings, too.
Make sure that you keep your abdominals pulled in on this exercise, especially if you’re prone to lower back discomfort.

Getting set
Kneel on your elbows and knees on top of a thick towel, with your knees directly under your hips and your elbows under your shoulders. Clasp your hands together or turn your palms toward the floor. Flex your right foot so it’s perpendicular to the floor. Tilt your chin slightly toward your chest, and pull your abdominals in so your back doesn’t sag toward the floor. See photo A.

The exercise
Keeping your knee bent, lift your right leg and raise your knee to hip level. Then slowly lower your leg back down. Between repetitions, your knee almost, but not quite, touches the floor. Complete all the repetitions with one leg before switching sides. See photo B.

Do’s and don’ts
  • DO keep your neck still and your shoulders relaxed.
  • DO move slowly.
  • DON’T throw your leg up in the air.
  • DON’T raise your knee above hip height.
  • DON’T arch your back as you lift your leg.

Other options
Kneeling butt blaster with weight (harder): Add an ankle weight to this exercise
or squeeze a small dumbbell in the well of your knee. We love this last option because your muscles have to work even harder to hold the weight in place.
Butt blaster machine: This machine mimics the kneeling butt blaster. You kneel with one knee on a platform, place your other foot onto a foot plate, and then press back and up. This machine is fine as long as you remember to keep your abdominals pulled in and resist arching your lower back.

Leg press machine


The leg press machine covers a lot of ground, strengthening your butt, quadriceps, and hamstrings. It’s a good alternative if the squat or lunge bothers your lower back.
You may want to try the modified version if you experience pain in your hips or knees.

Getting set
Set the machine so that when you lie on your back with your knees bent and feet flat on the foot plate, your shoulders fit snugly under the shoulder pads and your knees are bent to an inch or so below parallel to the foot plate. Place your feet as wide as your hips with your toes pointing forward and your heels directly behind your toes. Grasp the handles. Pull your abdominals in and keep your head and neck on the back pad. See photo A.

The exercise
Pressing through your heels, push against the platform until your legs are straight. Then bend your knees until your thighs are parallel with the platform and the weight plates you’re lifting are hovering just above the weight stack. See photo B.

Do’s and don’ts
  • DO press your heels into the foot plate instead of allowing them to lift up.
  • DON’T lower your thighs past parallel with the foot plate or allow your knees to shoot in front of your toes.
  • DON’T arch your back off the pad to help move the weight.
  • DON’T lock your knees when your legs are straight.

Other options
Different types of machines: You may run across several types of leg press machines. One has you sitting in an upright position, pressing your legs out straight. Another is called a 45-degree leg press: You lie in a reclining position and press up and out diagonally. Yet another version has you lie on your back and press your legs straight up. All these variations are acceptable. Just remember: Don’t bend your legs so far that your thighs are smooshed against your chest and your knees are hanging out there in Never-Never Land. Keep in mind that your foot position changes the emphasis of the exercise. The higher you place your feet on the foot platform, the more you emphasize your butt muscles.
Modified leg press (easier): If you have chronic knee problems, you can still do this exercise. Set the seat height so your thighs are a few inches above parallel — this position limits the distance you can bend your knees. However, this version focuses more on your front thigh muscles and less on your butt.
One-leg leg press (harder): Use the same form as with the basic version of this exercise with one foot lifted up and off the foot plate. After you complete your reps, switch legs.

Sunday, January 31, 2010

Understanding Lunge


The lunge is a great overall lower body exercise: It strengthens your butt, quadriceps, hamstrings, and calves.
If you feel pain in your hips, knees, or lower back when you do this exercise, try the split lunge version described in the “Other options” section.

Getting set
Stand with your feet as wide as your hips and your weight back a little on your heels, and place your hands on your hips. Pull your abdominals in and stand up tall with square shoulders

The exercise
Lift your right toe slightly and, leading with your heel, step your right foot forward an elongated stride’s length, as if you’re trying to step over a crack on the sidewalk. As your foot touches the floor, bend both knees until your right thigh is parallel to the floor and your left thigh is perpendicular to it. Your left heel will lift off the floor. Press off the ball of your foot and step back to the standing position. See photo B.

Do’s and don’ts
  • DO keep your eyes focused ahead; when you look down, you have a tendency to fall forward.
  • DON’T step too far forward or you’ll have trouble balancing.
  • DON’T lean forward or allow your front knee to travel past your toes.

Other options
Split lunge (easier): Start with one leg a stride’s length in front of the other. Bend both knees, and lower your body so your ending position is the same as in the basic lunge. You may want to lightly grasp the back of an upright bench or a chair for support.

Lunge with weights (harder): Hold a dumbbell in each hand with your arms down at your sides, or place a barbell behind your neck and across your shoulders. You also can do the split lunge while holding a dumbbell in each hand or by using the Smith Machine.

Backward lunge (harder): Step your right leg back about a stride’s length behind you, and bend both knees until your left thigh is parallel to the floor and your right thigh is perpendicular to it. You’ll feel this version a bit more in your hamstrings.

Traveling lunge (harder): Perform the basic lunge, alternating legs so you travel forward with each repetition. You need a good 10 yards of space to do this. Bend your arms to 90 degrees and swing them purposefully. This variation is great for skiers, hikers, and climbers as it mimics the moves that are used in those activities.

Understanding Squat


In addition to strengthening your butt muscles, the squat also does a good job of working your quadriceps and hamstrings. If you have hip, knee, or lower back problems, you may want to try the modified version.

Getting set
Hold a dumbbell in each hand or place your hands on your hips or on the tops of your thighs, or allow them to hang comfortably down at your sides. Stand with your feet as wide as your hips and with your weight slightly back on your heels. Pull your abdominals in and stand up tall with square shoulders.
See photo A

The exercise
Sit back and down, as if you’re sitting into a chair. Lower as far as you can without leaning your upper body more than a few inches forward. Don’t lower any farther than the point at which your thighs are parallel to the floor, and don’t allow your knees to shoot out in front of your toes. When you feel your upper body fold forward over your thighs, straighten your legs and stand back up. Take care not to lock your knees at the top of the movement. See photo B.

Do’s and don’ts
  • DON’T allow your knees to travel beyond your toes. We know we said this before, but it bears repeating.
  • DON’T look down. Your body tends to follow your eyes. So if you’re staring at the ground, you’re more likely to fall forward. Instead, keep your head up and your eyes focused on an object directly in front of you.
  • DON’T shift your body weight forward so your heels lift up off the floor. When you push back up to the standing position, concentrate on pushing through your heels.
  • DON’T arch your back as you stand back up.

Other options

Weightless squat (easier): If you have trouble balancing or completing at least eight repetitions of the squat with good form, skip the weights. Instead place your hands on your hips or the tops of your thighs as you do the exercise.

Bench squat (easier): Place the end of a bench behind you and allow your buttocks to lightly touch the top of it as you sit downward. This placement helps you guide your movement and perfect your form.

PliĆ© squat: To add emphasis to the inner and outer thighs, place your feet out a little wider apart and angle your toes outward. Most people lower farther in this position because they feel more stable. Still, don’t travel any lower than the point at which your thighs are parallel to the floor, and don’t let your knees shoot out past your toes.

Barbell squat (harder): When you’ve mastered the squat, progress to the barbell squat for even greater challenges. Place a weighted bar in a power cage so when you stand underneath it, the bar rests gently across the top of your shoulders. Stand with your feet as wide as your hips, weight shifted slightly back on your heels, and hold on to either side of the bar with your hands wider than shoulder-width apart. Pull your abdominals in and stand up tall with square shoulders.

Sit back and down, as if you’re sitting into a chair. Lower as far as you can without leaning your upper body more than a few inches forward. Don’t lower any farther than the point at which your thighs are parallel to the floor, and don’t allow your knees to shoot out in front of your toes. When you feel your upper body fold forward over your thighs, straighten your legs and stand back up.

Avoiding Mistakes When Working Your Lower Body


Here are the most common pitfalls to watch out for when training your butt and legs:
  • Don’t play favorites. In other words, don’t work your butt muscles and neglect your thighs just because you want to fill out the back of your jeans. Strive for balance. If one lower body muscle group is monstrously strong compared to the others, it pulls your posture out of alignment and you may end up with an injury.
  • Don’t put your knees in jeopardy. Avoid locking your knees when you’re lifting a weight, and don’t allow your knees to shoot out past your toes in the squat, lunge, or leg press. If you feel knee pain during an exercise, stop immediately. Try another exercise and return to the one that gave you trouble after you’ve been training for a few weeks. Or perform a simpler version of the exercise, restricting the distance you move the weight.
  • Don’t perform more than 15 repetitions for any leg exercise for strength training. Some people, afraid of developing bulky legs, use extremely light weights and perform 40 repetitions. You’re not going to build much strength this way, and you’ll probably fall asleep in the middle of a set. You also increase your chance of injury from placing too much repetitive stress on your joints.